Showing posts with label Basic Grey. Show all posts

Tuesday, March 19, 2013

Happy Birthday!


Hi everyone! It's great to be back and sharing a project with you all today. My youngest will be turning 7 the end of this month, so I wanted to make a centerpiece for his birthday celebration. My son likes cupcakes instead cake, so I thought this would work on the top tier of a cake stand, surrounded by some yummy cupcakes - Hope he likes it!


The Marvin the Martian outline was cut in black vinyl twice, using my Silhouette. The first vinyl cut out was placed on white foam board and cut out. Then the second one was used to add a little dimension to the piece. If you look on the side of Marvin you can see how I glued 2 layers of foam onto his "skirt," his shoes, helmet. (His visor is an additional layer cut from chipboard.) The solid primary colors were cut in paper, then cut and glued into place. I then painted the sides and back of the piece with black paint.


The number seven was hand drawn and then cut out of 2 layers of foam board and covered with patterned paper.  A zig-zag border was then applied around the edges. Pennant flags were stamped onto patterned and solid papers, strung together and then pinned in place with small pinwheels.


I used two paper mache boxes to create the base. They were covered with patterned paper and borders and a little zipper trim, then stacked. The number dial was created out of a large round sticker, that was mounted to some chipboard. I then used my Silhouette to cut a out the "happy birthday" border in black cardstock and attached it to the back of the dial. The traffic light is also a sticker that was mounted to some chipboard and  embellished with buttons.


 Supplies:
Maya Road - pennant stamps, trinket pins, zipper trim, wood buttons and chipboard circle.
Basic Grey - brad and solid papers (red, yellow, teal and green)
October Afternoon - patterned papers, stickers and die-cuts
Silhouette - Black vinyl, (cutting files: Marvin the Martian, arrow, borders and pin-wheels)
Other craft supplies -  2 round boxes, dowel, cardstock, foam core and raw chipboard.

Monday, July 30, 2012

Keeping It Simple

Hi guys! Hope you all enjoyed your weekend. Today I'm back to show you a clock I altered, very simply out of paper. This will be getting handled regularly, so I didn't what to have anything dangling or sticking out that might fall off. 


Mod Podge was used to adhere the paper to the clock, then a clear sealer was applied to finish and protect it. The patterned papers used on this project are all from the Basic Grey PB&J collection, including the paper on the face of the clock, which is from the 6x6 paper pad.


The number border used was cut out of vinyl using my Silhouette.


 Thanks for visiting! :)
Jen

Tuesday, July 24, 2012

Think Happy Thoughts!

Hi all! :) I have to say that PB&J is another one of my favorite collections by Basic Grey. Today I have a simple canvas to share using papers, embellies and loads of chipboard from the line.


The grid used at the back of the houses, is actually the leftover part of the chipboard sheet, that I pulled the chipboard rectangles from. I just misted it brown and applied some paper to the back.


The sides of the canvas were covered with patterned paper and a border, that was cut on my Silhouette, was used around the edges. 

Thanks for stopping by! I'll be back soon to share some more PB&J.

Jen

Thursday, July 19, 2012

Nothing But Blue Skies

Hi everyone! :) Today I have a fun gift box idea to share with you.  Most of the patterned papers used on this project are from the What's Up 6x6 paper pad, by Basic Grey. (Except for the teal paper used on the larger owl, with is Apronista from their Picadilly line.)


The little owl design was cut out on my Silhouette and then mounted to some thick layers of chipboard. Once the eyes and chest pieces were glued into place, I made a banner for the smaller owl to hold out of stick pins and a die-cut. While the larger owl was given a flag to hold.


The ball the owls are balancing on, is a wood knob that was painted first then small paper circles were glued onto it.

Border stickers, ribbon and a small garland were used to embellish the rest of the paper mache box.

Before I go, I have one more project to show you. These little guys were made to go in my kids bathroom. The seahorse images for these were cut out on my Silhouette first and then transferred onto wood.

For more details, you can go to my Basic Grey blog post, here.

See you soon,
Jen

Friday, June 22, 2012

What's Up?!!!


Okay - I said I'd be back with a What's Up project and here I am! :)  I found this cute bird house at Michaels and decided to turn it into a bird motel. All the papers were adhered to the surface of the house using Plaid's matte Mod Podge, which is pretty much what I use on most of my projects.


For the roof, I used 1"circles folded in half and layered for a shingle effect. A border was cut out on the Silhouette and glued to the top of the roof to finish it off. Once the birdhouse was covered completely, I used my Silhouette again to cut some grass and leaves. Then glued them here and there for greenery.


Chipboard elements were glued onto some twine to create a banner, then glued onto place on the roof. 

I made a small sign using chipboard pieces and stickers.  Then a painted dowel was attached to the back, so the sign could be attached to the roof.

Have a great weekend! :) Jen

Thursday, June 14, 2012

No Sew Pin Cushions

Hello everyone! :) Today I have an easy project idea for storing stick pins. The wooden pots and tray I used are sold together, very inexpensively at Michaels. I think it was about 3 dollars for the set and they have them in different sizes. 


I used Basic Grey's Konnichiwa collection again on this. Just covering the tray and each pot with patterned papers and adding just a few stickers and embellishments for decoration. I glued a block of foam inside each pot, then glued half of a foam ball on top of each one. Some felt was then placed on top and pushed in around the sides with a small file.


If you don't have that many stick pins, you could just use the pots for buttons, brads or other small embellishments.

 
Thanks for stopping by!
Jen

Thursday, June 7, 2012

Thanks!

Hi all! :)  Today is the last day of school for the kids here. So I thought I'd make a gift card holder for my little girl's 1st grade teacher.  Sorry about the photos, the holder was kind of a last minute idea, so I ended up taking pictures this morning, and of course it was dark and rainy.


The design was drawn out on my Silhouette first then transferred onto some chipboard. I also used the Silhouette to cut the 3D flowers in the girl's hair. The papers, stickers and most of the embellies used are from Basic Grey's Konnichiwa collection.

 Here are a few close-ups.


Here in this back view, you can see the small envelope made to fit the gift card.  

Thanks for visiting! I'll be back soon with another Konnichiwa project.

Jen :)

Thursday, May 24, 2012

Teapot Fun


Hi everyone, so here's the Mother's Day gift I was talking about in my last post. This idea could work for different occasions too, maybe a birthday gift or centerpiece for a party.  All the details on how I did this are on the BG blog HERE.


Monday, April 30, 2012

Plumeria Projects!

Hi all!  Today I'm back with a couple projects I should have posted a while ago. Both of these projects use Basic Grey's Plumeria collection which is versatile enough for a lot of different occasions. I used the collection for an Easter word sign and Spring gift box. Since Easter is long gone I'd better share that project first!


I got this "Easter" sign from Hobby Lobby last year, in their after season sale. I basically just covered the whole thing in patterned papers, used some crochet trim around the edges of larger letters and then used some fun  chipboard  and accordion sticker embellishments to finish it off.


Here's a close up. Don't you love that navy blue patterned paper! :)


My next project is a gift box just in time Spring! This is a pattern I've used before by Tonya Renee. It's just too cute to use once.


For the yellow ruffles around the rabbit's neck I separated the Buttercup in Bloom petals before hot gluing them around her neck. The pink flowers on the headband from are from a Blush in Bloom blossom,  I just added mini pom poms to the center of each one.


Thanks for stopping by,

Jen

Wednesday, March 28, 2012

I'm Back!

Hi all! I know it's been a while. March has been a very busy month for me and my family, as we relocated from Ocala to Orlando, Florida. Now that I have the basics unpacked, and my computer set up, I thought I'd do a quick post to catch up on some of my projects.


This is a project I made using Basic Grey's Monogram Chipboards. I used some foam core to turned the monograms into these little shadow boxes. I'm working on the tutorial now and it will be posted to the BG blog very soon. You can also check out this post to get some more inspiration on how else to use these fun monograms.


Next I have a centerpiece I made for my son's 6th birthday, which is tomorrow. It's made out of a couple of paper mache boxes, a wood robot cut out and of course lots of Basic Grey goodness!  For more details on how I made this, you can go HERE.

I recently received my Basic Grey DT box filled to the brim with their newest collections. So I'll be back with some new projects soon! ;)
Jen

Thursday, February 16, 2012

Love Is Tweet!


Hello everyone!  Hope you all enjoyed Valentine's Day.  Here's the project I created for Basic Grey's, Cupid Countdown last week. All the info and BG supplies used are listed on their blog here

Additional supplies used: 
Maya Road - Chipboard bird and hearts album pages.
Say It With Letters - Scalloped Heart Frame

Thursday, February 9, 2012

One More V-Day Idea!

Hi all! Just wanted to share one last Valentine's Day project before the big day. Unfortunately I can't post it on my blog until Thursday of next week! So I thought I'd share the link to the Basic Grey blog, where you can see the project and how I created it. Make sure to check out all the other "Cupid Countdown" projects by the rest of the design team, as well. You'll be inspired! :)


Monday, February 6, 2012

Monster Love!

Hi all! :) Today I'm back with another Valentine's Day project. This time a card! The monster design for this was cut out on my Silhouette machine. Then I "went to town" with my Kissing Booth patterned papers and embellishments. The 3 chipboard flowers used on the eyes are by Basic Grey as well, but from the much older Sugered collection. I just covered them with patterned paper to match the rest of the card.


The scalloped strips used on the body were also cut on the Silhouette. To add some texture to them I gently scrunched them up a little bit before gluing them to the card.
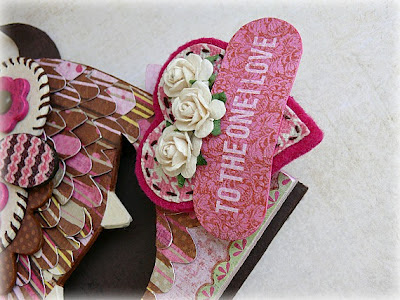

I used a canvas heart from the Die-cut Paper and Canvas Flowers set and some felt to make a heart shaped pillow for the monster to hold. The pillow has a little safety pin on the back so it can be worn as a pin by the recipient.


Thanks for stopping by,
Jen  :)


Friday, January 27, 2012

Hugs & Kisses!

Happy Friday, guys! Have you all been checking out Basic Grey's sneaks this week? - I know I'm in LOVE! Can't wait to see the full reveal of all the collections on Sunday!!!  But until then I have some "hugs and kisses" to share! :)

I picked up some 3" chipboard X's and O's from Hobby Lobby and doubled them up to get the thickness I wanted. Then I covered them with some of Basic Grey's Kissing Booth patterned papers before gluing them to a wood art board, which I also covered with paper.


I finished off the the piece by adding some stickers, die-cuts, brads and other fun embellishments all from the Kissing Booth collection.

Here are a few more pictures.


Next, I have a set of baby onesies to share. These were done for the BG blog last week, so all the details can be found  HERE.
 

SUPPLIES : [BABY] BAB-9025 Sassy, [FABRIC] FAB-8094 Berry Essential Buttons, FAB-8042 Blush In Bloom, FAB-8037 Blanc In Bloom.

Have a great weekend!
Jen

Monday, January 16, 2012

Lock and Key

The Indie Bloom collection by Basic Grey is very vibrant, playful and full of bold prints. But for this project I decided to just use the rosy floral pattern (Pico De Gallo) and some solid colored papers to get a Valentine feel.


The Heart Lock and Key (by Jamie Koay) were once again drawn out on my Silhouette Digital Cutter and used as templates, then the lock was cut out of half inch wood and the key out of quarter inch wood. Ater all the papers were mod podged ono the wood some glitter was added. I used a spray sealer to finish and then added the element sticker, buttons and twine.

SUPPLIES: [INDIE BLOOM] INB-3411 Pico De Gallo, INB-3409 El Camino, INB-3400 Panache, MET-3422 Brads and Buttons, INB-3419 Element Stickers. [SWEET THREADS] SWT-3280 Her Way.

Tuesday, January 3, 2012

Happy New Year!

Hi guys and Happy New Year! :) Now that the holidays are over it's time to get back into the swing of things. So today I have a project to share. This is a little rocking horse that I cut out of wood using a Silhouette file (Baby Set by Jaime Koay) as a template.


I then used patterned paper's from Basic Grey's Picadilly collection, some chipboard and other embellishments to finish it off. Here's another shot of the rocker so you can see some more of the details.


I'll be back soon with a another Basic Grey project, this time something for Valentine's Day. Thanks for stopping by. :)

Friday, December 16, 2011

Nordic Holiday!

Hello everyone! Are you ready for the holidays yet!  I just started my Christmas shopping on Monday and I still have a little bit more to do before the big day. So with Christmas in mind, I thought I'd share a couple Nordic Holiday projects for Basic Grey with you today.

Here's a before shot of a Santa I picked up at Hobby Lobby last year. He originally had legs, but his body was too heavy and he kept toppling over. So I decided to give him a facelift.


Here he is, after his Nordic Holiday make-over!


I used some dowels for his legs and  made some shoes out of felt. Half a foam ball was used as a base to hold Santa upright. As you can see below, I used torn pieces of paper to cover the foam ball, then added paper and chipboard strips around the base.


Beads, chipboard pieces and wire were used to create a garland. Then hot glue was used to secure the wire to the back of Santa's hands.


Here's a few pictures of the finished piece.


SUPPLIES: [Nordic Holiday] NOR-3438 Chalet, NOR-3439 Sweater Weather, NOR-3440 Après Ski, NOR-3444 Carving, NOR-3445 Catching Air, NOR-3449 Lift Ticket, NOR-3453 Yard Sale, MET-3460 Glazed Brads, MET-3461 Stitched Brads, NOR-3465 Glitter Chipboard, NOR-3469 Journaling Sets. [Little Black Dress] LBD-3486 Drama Mod. [Periphery] CHP-979 Chip Sticker Shapes.

Next, I have a mini banner to share.  Shhh! This one's a gift for my little girl's teacher, Ms. Bray.


I had originally thought of doing an ornament, using just the top section....


....but I really wanted to used a little bird sticker (from the Nordic Sticker Element sheet), so I just kept adding more chipboard...


until I found the perfect spot for it here.


SUPPLIES: [Nordic Holiday] NOR-3445 Catching Air, NOR-3446 Slalom, NOR-3453 Yard Sale, MET-3461 Stitched Brads, NOR-3465 Glitter Chipboard, NOR-3456 Element Stickers. [Figgy Pudding] CHP-358 Chip Sticker Shapes. [Periphery] CHP-979 Chip Sticker Shapes.


Last but not least, I have a gift box idea that was posted on the BG blog last week. For this project I got to play with Core'dinations cardstock! All the details on how to make this can be found HERE.

Thanks so much for visiting my blog. Enjoy your weekend!!! :)

 
Blog Templates by Delicious Design Studio