Showing posts with label Valentine's Day. Show all posts

Wednesday, January 27, 2016

Love Bug

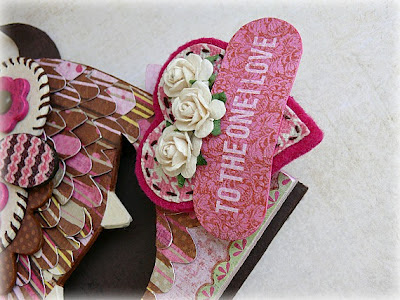
Hello everyone! Today I'm sharing a Valentines project I made with Doodlebug's Sweet Things collection.  This piece uses a mixture of materials including paper mache, felt, wood and wire.  But what brings the whole thing together are the adorable patterned papers and fun embellishments from the collection.


For more details on this project you can visit the DB blog here. ;)

Wednesday, February 12, 2014

Love Struck

 
Hello guys! This little love-bug is my latest project for my Maya Road blog post, that's up today. I did a short tutorial for it, so if you're interested you can find it here. I know I'm a little early, but - Happy V-day!!! :)


Maya Road Supplies Used: Paper Twine Cording (Cloud and Carnation), Twine Cording (Cotton Candy), Mini Roses (Cherry), Vintage Paper Roses, Heart Pins (pink and cream), Pale Pink Pearl Ball Pins, Say Cheese Mini Set, Love Words Mini Chipboard, Shot Through the Heart Set, Mini Heart Confetti Set, Kraft Note Envelopes, Scallop Frame Set, Perfect Shot Arrow Stamps, Chipboard Photo Frames (square on base), Mini Memories Camera, Maya Mist (Earl Grey), Fabric tape (Cherry red).

Additional Supplies:
Patterned Paper - Pebbles and Basic Grey
Die cut and stickers - Basic Grey
Other - 3" plastic ball, ping pong ball, wood lid, 5''wood dowel, 2" blocks, clay, glitter, paint, ink, felt, small felt ball and thread.


Wednesday, January 15, 2014

Loved

Hi all! It's my turn to share a project on the Maya Road blog today. This is a home decor piece that I created with Valentine's Day in mind. But really it could be used all year round.

Here's the link to the post.

Thursday, February 14, 2013

Some Bunny Loves You!


Hello everyone and Happy Valentine's Day! I made it back just in time to share my V- day bunny.


Here she is in a close up. Technically, I made her as a Valentine's decoration, but she's become a little pin cushion holder and now sits on a shelf just above my work area.

This project was very simple to make. The  pattern / image (seen below) is actually from my Silhouette library. I used a sketch pen to draw the image onto some cardstock, then cut it out by hand to make the pattern. After tracing out the images  onto some felt, I cut the pieces out and added about a 1/4" around each piece for the seam allowance.


The two body pieces were stitched together, turned inside out then stuffed. The ears were stitched together and turned inside out also, but instead of stuffing them I used a blanket stitch around the outer edges.  The ears were then stitched onto the head. For the front paws, I cut them out freehand. I wanted them to hold the heart and the original design's feet wouldn't have worked, as I needed them to look more like hands. I also decided to add a white muzzle, (which was also cut freehand) to the face and omit the teeth. The base the bunny is sitting on, is made out of a paper mache box lid. The lid was covered in felt and then embellished  with a felt border, ribbon and flower.


Supplies Used:
Fancy Pants - felt arrow, flowers and frames.
Maya Road - red flower
Basic Grey - felt trim and small hearts
Hobby Lobby - felt, paper mache box lid, stuffing, embroidery thread, micro beads, wood dowel.
Other - cardstock, black marker, brad, felt ric-rac and printer.

Have a great Valentine's Day!

Jen

Thursday, February 16, 2012

Love Is Tweet!


Hello everyone!  Hope you all enjoyed Valentine's Day.  Here's the project I created for Basic Grey's, Cupid Countdown last week. All the info and BG supplies used are listed on their blog here

Additional supplies used: 
Maya Road - Chipboard bird and hearts album pages.
Say It With Letters - Scalloped Heart Frame

Thursday, February 9, 2012

One More V-Day Idea!

Hi all! Just wanted to share one last Valentine's Day project before the big day. Unfortunately I can't post it on my blog until Thursday of next week! So I thought I'd share the link to the Basic Grey blog, where you can see the project and how I created it. Make sure to check out all the other "Cupid Countdown" projects by the rest of the design team, as well. You'll be inspired! :)


Monday, February 6, 2012

Monster Love!

Hi all! :) Today I'm back with another Valentine's Day project. This time a card! The monster design for this was cut out on my Silhouette machine. Then I "went to town" with my Kissing Booth patterned papers and embellishments. The 3 chipboard flowers used on the eyes are by Basic Grey as well, but from the much older Sugered collection. I just covered them with patterned paper to match the rest of the card.


The scalloped strips used on the body were also cut on the Silhouette. To add some texture to them I gently scrunched them up a little bit before gluing them to the card.


I used a canvas heart from the Die-cut Paper and Canvas Flowers set and some felt to make a heart shaped pillow for the monster to hold. The pillow has a little safety pin on the back so it can be worn as a pin by the recipient.


Thanks for stopping by,
Jen  :)


Friday, January 27, 2012

Hugs & Kisses!

Happy Friday, guys! Have you all been checking out Basic Grey's sneaks this week? - I know I'm in LOVE! Can't wait to see the full reveal of all the collections on Sunday!!!  But until then I have some "hugs and kisses" to share! :)

I picked up some 3" chipboard X's and O's from Hobby Lobby and doubled them up to get the thickness I wanted. Then I covered them with some of Basic Grey's Kissing Booth patterned papers before gluing them to a wood art board, which I also covered with paper.


I finished off the the piece by adding some stickers, die-cuts, brads and other fun embellishments all from the Kissing Booth collection.

Here are a few more pictures.


Next, I have a set of baby onesies to share. These were done for the BG blog last week, so all the details can be found  HERE.
 

SUPPLIES : [BABY] BAB-9025 Sassy, [FABRIC] FAB-8094 Berry Essential Buttons, FAB-8042 Blush In Bloom, FAB-8037 Blanc In Bloom.

Have a great weekend!
Jen

Monday, February 14, 2011

Happy Valentine's Day!


I thought I'd share this little bee with you all, since it's Valentine's day today! :) This was another CHA project done for the Maya Road booth.  The bee was made out of a paper mache ornament and a styro-foam ball, that were covered with patterned paper. I used a chipboard butterfly from the Butterfly Accordion Album for her wings. Then added some Satin Pleated Ribbon around the bee's middle. To attached  the bee to the base a wooden dowel was threaded through the box, and up through the body and head.


Leaves and Felt Pearl Flowers were added to the top of the box along with some Vintage Pearl Pins.

 
Here's a close-up of the chipboard and banner on the sides of the box.


Supplies
Maya Road - Chipboard Letters, Pearl Felt Flowers, Vintage Pearl Pins, Heart Trinket Pins, Satin Pleated Ribbon, Chipboard Mini Love set (hearts), Butterfly Accordion Album.
 Patterned Paper - Pink Paislee (Sweetness collection)
Samantha Walker - (Silhouette) "Scalloped Circle Border" File
Paper mache box and ornament, styro-foam ball, wood dowel and embroidery floss - Hobby Lobby
Adhesive - Plaid Mod Podge (Matte)

Thanks for stopping by today and have a wonderful Valentine's Day!

 
Blog Templates by Delicious Design Studio