Showing posts with label Helmar. Show all posts

Wednesday, May 20, 2009

Twice the fun, with Helmar and Karen Foster Designs!


Today, I have two Helmar USA projects to share with you! Both of them feature Karen Foster Designs, one of Helmar's preferred partners. This company was so generous with their supplies! They gave us so many themed papers, stickers and embellishments to play with, it was hard to choose what to do. I finally decided on using the Sweet Sixteen and a combination of the Cruise and Baby Boy lines for my projects.


U R Fabulous!
I thought this little flip-flop gift box and matching mini card would be a cute idea for a sixteen year old! I found the paper mache box at Michaels and it's the perfect size for jewelry or even car keys!!! :)

After painting the lid of the box black, I used some of the 2 step Crackle Medium. When the lid was dry I rubbed some light pink paint into the cracks and then quickly wiped off the excess paint with a damp rag.

The rest of the box was then covered with patterned paper using the Acid Free Glue and stickers.

Before adding the 16 and flower sticker to the box and card, I brushed on a thin layer of the Acid Free Glue and then added some translucent glitter.


Supplies used:
Helmar - Crackle Medium and Acid Free Glue
Karen Foster Designs - Patterned paper and stickers.
Mark Richards - Pearls
Making Memories - Mini letter stickers
Maya Road - Stick pin
Bazzill - Tulle ribbon and cardstock
Michaels - Flip-flop box


For Your Bundle of Joy
My next project is all about a baby!!! This sailboat was purchased from Michaels also. They had a bunch of other nautical items, so if you wanted to you could alter a whole set for a nursery!!!


Most of this project was put together using the Helmar's Craft and Hobby PVA Glue.
For some dimension on the Lifebuoy, duck and "Bundle of Joy" sticker I used Liquid Scrap Dots.
The tiny buttons were applied using Gemstone glue.


Supplies used:
Helmar - Craft and Hobby PVA Glue, Liquid Scrap Dots and Gemstone glue.
Karen Foster Designs - Patterned paper and stickers.
Pink Paislee - Topsiders borders
Making Memories - Mini letter stickers and paint
American Crafts - Chipboard
Lasting Impressions - Buttons
Michaels - Sailboat

Thanks for visiting!!!

Jen :)

Saturday, May 16, 2009

Just 4 Dad!

With Father's Day coming up, thought I'd share a gift idea with you now, so you have plenty of time to get one done, if you choose to.
When I was younger I would always buy my dad a tie for Father's Day. Some of them were pretty ugly, but he'd always smile and give me a big hug, like it was the best gift in the world!!! :)
4UDad_penandclip_ByJenniferBeason
So, keeping with that tradition, I thought I'd alter a XL paper clip from Clear Scraps and convert it into a simple tie shape, by adding a piece of chipboard to the top. I used Helmar's 450 Quick Dry Adhesive to adhere the patterned paper to the acrylic paper clip, it dries crystal clear and since the patterned paper is double sided, it gives the back of the clip a nice finished look. To make the gift set complete I also altered a desk organizer, pen and small binder clip using the Wrangler collection by Paper Trunk.
4UDadByJenniferBeason_picnik

Above you can see how I used Helmar's Crackle Medium on the edges and base of the desk organizer. To achieve this look I painted the edges and base of the organizer with some brown paint, then applied step 1 and 2 of the Crackle Medium as directed on the bottle. When dry, I used some light yellow paint to rub into the cracks. Tip: Make sure when using paint to do a small area at a time. After you apply the paint wipe it off with a damp rag quickly, so the paint just stays in the cracks and not the surface of your project. After the Crackle Medium has dried use Helmar's Craft and Hobby PVA Glue to adhere the patterned paper to the sides and inside of the organizer.

Supplies Used:

Helmar - Crackle Medium, Craft & Hobby PVA Glue and 450 Quick Dry Adhesive.
Clear Scraps - XL Paper Clip
Paper Trunk - Patterned paper (Wrangler collection)
Pink Paislee - Alphabet letter stickers and brad
Making Memories - paint and mini letter stickers
Hobby Lobby - Desk organizer
Other: pen, binder clip and twine.

Tuesday, April 28, 2009

More Helmar and Scribble Scrabble


My little girl recently told me that I hadn't made anything for her lately, so when I saw the colors of the Ruth collection by Scribble Scrabble, I thought of her immediately. I made this corkboard for her room, so she can hang up her favorite photos or her artwork. I found this one at Big Lots, but you can pick one up almost anywhere, inexpensively.


I covered the surface and sides of an art board with the patterned papers using Helmar's Acid Free Glue. If you can't find art board you can use anything that is square shaped and sturdy, I just used the art board because that's what I had laying around. The big chipboard flower was then covered with patterned paper and buttons. (I used the Gemstone Glue to apply the buttons.) To hold the paper rosette in the center together I used the 450 Quick Dry Adhesive. The border strips were applied using the Acid Free Glue.


I'm thinking I might make one of these for my mom for Mother's Day!

Helmar Acid Free Glue
Helmar 450 Quick Dry
Helmar Gemstone Glue
Scribble Scrabble - Patterned papers and die-cuts.
Pink Paislee - Border Topsiders
Making Memories - Chipboard flower and paint
Rusty Pickle - Buttons
Other - corkboard and art board

See you soon,
Jen

Thursday, April 23, 2009

Scribble Scrabble Bangles!


One of the preferred partners for the Helmar design team is Scribble Scrabble. I received the the Evelyn collection and was immediately attracted to the bright, fruity colors. I decided to use it to make these fun bangles!!!

I was thinking about a Mother's Day gift when I started these, but as usual, I'll probably be keeping them for myself!!! If you would like to try making these, I have instructions on the Helmar blog.

Have a great day! :)

Jen

Saturday, March 28, 2009

Look who's turning three!


This Sunday is Jacob's third birthday, I can't believe it!!! Wasn't it just yesterday when I brought him home from the hospital? :) Here's a recent picture of "the little stinker" trying to squirt paint on me as I'm taking his picture! Anyway, I decided to make a card as one of my Helmar USA assignments, to celebrate his birthday. He can look at it, but definitely NO TOUCHING!! Too many beads - plus he just loves to tear stuff up!!! (lol)


I made the base of the card using the Mini Square Dots stencil from The Crafter's Workshop. I love scallops, it's just one of those trends I just can't let go!! The cardstock stars are also made using a stencil, for those I used the Boom Boom Boom 12"x12" stencil. The Crafter's Workshop is one of Helmar's preferred partners, I got a ton of really cool stencils, so you'll be seeing me using them quite often, I'm sure.

For this assignment my focus was suppose to be the Premium Craft Glue, but as you can see from supply list I used quite a few other adhesives too.

The patterned paper strip and transparency were adhered using the Quick Fix Permanent Adhesive Runner. In my design I could hide the glue on the transparency under the patterned paper, but if you ever need a glue that won't show up under a transparency the V2 Vellum Adhesive is perfect for that!

I used the Premium Craft Glue for the felt stars, ribbon and cardstock stars. The tiny beads were adhered using the Gemstone Glue. The gemstone glue starts out white, but dries clear, which I like a lot - I can see exactly where it is!!!


Supplies:
Helmar Premium Craft Glue
Helmar Gemstone Glue
Helmar Liquid Scrap Dots
Helmar Quick Fix Permanant Adhesive Runner
Crafter's Workshop - Stencils
Pink Paislee - Patterned Paper (black)
Basic Grey - Patterned Paper
Autumn Leaves - Felt ribbon
Hambly Screen Prints - Transparency
Hiedi Swapp - Iron on letters
Fancy Pants - Felt stars
Hobby Lobby - Beads
Bazzill - Cardstock


[Blog_Divider_shabbymissjenndesigns.png]


My next project is an altered paper mache box I picked up at Hobby Lobby for a couple bucks. I used Pink Paislee patterned papers, chipboard elements, borders and letters to decorate.

I basically just covered the box with patterned paper using the Acid Free Glue. Then used the Gemstone Glue to attach the pearls on the lid of the box. (The pearls came with an adhesive strip on the back, but when I separated the pearls I had to add more glue.)

I pleated the scalloped paper to add some texture to the top of the box and then used the Premium Craft Glue to adhere the chipboard strips.

All of the chipboard elements where self adhesive, but to give the butterfly a little more dimention I used the Liquid Scrap Dots. I also used The Liquid Scrap Dots on some of the chipboard letters.

Supply List:
Helmar Acid Free Glue
Helmar Premium Craft Glue
Helmar Liquid Scrap Dots
Helmar Gemstone Glue
Pink Paislee - Patterned paper, chipboard elements, chipboard border, glitter, chipboard letters, letter stickers and button.
Maya Road - Felt flower and stick pins
Mark Richards - Pearls
Bazzill - Tulle ribbon
Hobby Lobby - Egg shaped box and embroidery floss


[Blog_Divider_shabbymissjenndesigns.png]


Don't forget, you still have time to leave a comment on the Helmar blog for a chance to win some of the Crackle Medium. I made this little swatch to give you an example of how it transforms chipboard. This Crackle Medium is a two step process, but it's really easy.


Doesn't this effect look great on this little dinosaur !!
Now go leave a comment, so you can GET CRACKLING TOO!!!

Enjoy your weekend! :)
Jen

Friday, March 20, 2009

Happy Spring!

Hello at there, I have a couple things to share today, since I haven't posted in over a week!

My first project is my Pink Paislee blog assignment. It goes "live" today so please stop by the blog and check it out. My focus was on the journaling again, but I decided not to do a layout this time. Instead, I altered a sandal and added the journaling to it. Here's a peek!


Back view of sandal


[Blog_Divider_shabbymissjenndesigns.png]

This next project was created for Helmar USA and my son's room. It's an example of what you can do with Helmar's Fray Stoppa.
These letters were painted on the sides and then covered with patterned papers from Cosmo Cricket. Helmar Acid Free Glue was used to adhere the paper to the letters and the wood car.
Go Play_Y_Closeup
Above you can see I tied the ribbon around the letter and the paperclip, then cut the ribbon and applied the Fray Stoppa to the raw edges. When it first went on, I was a little worried that It might stain the ribbon, but it dried perfectly clear, and look how nice and neat my ribbon looks. Love it!!!
GoPlay_Car

Here I added ribbon around the edge of the car. To make sure the ribbon doesn't unravel I applied some of the Fray Stoppa to the cut ends.

GoPlay_A_Closeup

For the letter "A" above I cut some denim scraps, then applied the Fray Stoppa to the raw edges. After about five minutes, when the denim was dry, I stitched along the top edges with embroidery floss then adhered it the rest of the project using Helmar's Premium Craft Glue.


Supply list:
Helmar Fray Stoppa
Helmar Premium Craft Glue
Helmar Acid Free Glue
Cosmo Cricket - Patterned paper, stickers, ribbon and chipboard
EK Success - Letters
American - Crafts Brads
Bazzill - Paperclip
Basic Grey - Buttons
Making Memories - Paint
Hobby Lobby - Car

Lastly, I just wanted to let you know Helmar is having another GIVEAWAY!!! This month you have a chance to win Helmar Crackle.
You have till the end of the month to leave a comment on the Helmar USA blog. Good Luck!!!

See you soon and HAPPY SPRING!!!! :)

Tuesday, February 24, 2009

Me again

I almost forgot that I could share these projects too. The new Pink Paisley, Fascinating line is so much fun to play with, and those big flowers are just crying to be cut out, right!!! The gift bag was purchased at The Dollar Store and then altered. Then I decided to make a little card to match, but I didn't want to copy the gift bag exactly, so I made the card a clutch bag instead.
I did do a "how to" on these, so it should be posted to the PP blog soon.


Gift bag


Card


I also wanted to let you know Helmar is having a GIVEAWAY of their top four selling adhesives. All you have to do is leave a comment on the Helmar USA blog stating what projects you've been working on and what you have planed for March. EZ PZ!!!

See ya soon!

Jen

Monday, February 23, 2009

Enjoy Spring!


Spring isn't here yet, but I'm trying to get ready for it!! Today I'd like to share a gift box idea, I did for a Helmar USA assignment. Basically it's just a recycled K & Company embellishment box dressed up for spring!!! It could be filled with jellybeans, mini chocolate eggs, a gift certificate or whatever you choose.


Here are a few close ups.


I used Helmar's Acid free Glue to apply all of the patterned papers to the box. For the chipboard borders I used the Premium Craft Glue to make sure I got a good bond quickly.
The stamped, cut out image was adhered to the box using Liquid Scrap Dots. I also the Acid Free Glue to apply some translucent glitter to the wings of the bunny costumes.

Supplies List:

Helmar Liquid Scrap Dots
Helmar Professional Acid Free Glue
Helmar Premium Craft Glue

Pink Paislee - Patterned paper, chipboard borders, letter stickers, glitter and rub-ons.
Stampabilities - Rubber stamp
Maya Road - Stick pins and flower
Bazzill - Tulle ribbon
Making Memories - Tiny letter stickers


Lastly, here is the full layout that was posted on the Pink Paislee blog last Friday. If you couldn't tell the Enchanting line is one of my favorites at the moment. :)


Close ups of the journaling.


See you soon,

Jen

Wednesday, February 18, 2009

Sorry

Happy Wednesday to you! I know it seems like I haven't been doing much this month. But I have....REALLY, I just can't share all my stuff with with you yet!!! I have a couple things for Pink Paislee coming up soon. My layout, yes I said layout, will be posted to their blog on Friday. I'll also be the guest designer over at Creative Cuts and More next month, so I've been getting my projects ready for that.


Anyway, here is a card I can share, my 2nd Helmar USA project for this month. I used K & Company patterned paper for the beak and feathery looking parts of the owl, the letter stickers are by Basic Grey and the rest of the patterned papers are by Pink Paislee along with the chipboard, rub-ons, brads and glitter.


To put this card together I mainly used Helmar's Acid Free Glue and for the beak and the lower part of the eyes, I used a little of the Helmar Liquid Scrap Dots. The blue and green berries on the branch are small circles punched out of patterned paper, with Helmar's Acrylic Sealer applied to give a gloss finish.


Before I go just wanted to let you know you can get directions for the Home project in my last post, on the Helmar USA blog today.

Thanks for stopping by, see you soon!

Jen

Monday, February 9, 2009

Home Is Where My Heart Is


Sorry I haven't posted in a while, I've been trying to catch up on some housework and everything else that got put on hold during CHA. I can't believe it's February already, can you? Seems like we just had Christmas, right!!
Anyway it is February, the month of LOVE! So, for my first Helmar project this month, I thought I'd work with this adorable scalloped heart from SayItWithLetters.com. All of the patterned papers are by Pink Paislee, as well as the the letter stickers, glitter and most of chipboard shapes.
For this project I used the Helmar's Craft and Hobby PVA Glue and their Liquid Scrap Dots.


You can see in this close up, that there is a lot of dimension and layering on this side of the heart, all achieved using the Helmar Liquid Scrap Dots. Everything else including the pleated paper trim and glitter was adhered using Helmar's Craft and Hobby PVA Glue.


See you soon and thanks for stopping by!

Jen

Wednesday, January 14, 2009

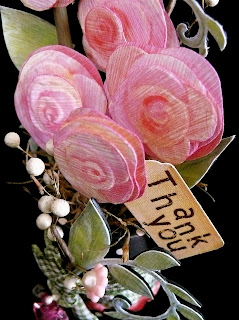
Say Thank You With Roses!!!


Here's a little "thank you" gift idea. All done using Helmar adhesives, of course!!! The roses and leaves are all cut out of the same sheet of patterned paper by K and Company. The paper I used is a couple years old, but you could use any floral patterned paper.


The rose petals are layered on top of each other using Helmar Liquid Scrap Dots. When the roses are dry just attach them to some painted wood dowels to create the stems. The leaves were glued onto some cardstock first before they were cut out, just to give them some strength.

The pot I used was solid on the inside, so I drilled holes into it to accommodate the dowels. If you can't find some thing similar, you could always use a mini plant pot with that "green foam stuff" on the inside. (Sorry I can't remember what it called, but it's used for flower arranging!)


Supply List:

By the way if you are interested in trying some Helmar products, don't forget about the GIVEAWAY they are running at the moment. Or you can always find their products at most Hobby Lobby stores.

Talk to you soon,

Jen

Monday, January 12, 2009

New Helmar Project

P1110226

I thought a card would be an excellent way "to show off" what you can do with Helmar Liquid Scrap Dots. I'm really not much of a stamper; however, when I use them, I like to cut them apart and give them some dimension.

For this project, I stamped the image of the mouse twice, using a brown fluid chalk. Then I heat embossed both images with a clear embossing powder. The cake and hat were stamped and embossed with a grey fluid chalk. Next, you color your stamped images using colored pencils, markers, or whatever you choose.

P1110218
Embellish the hat with some rick-rack. Add a little glitter to the top of the cake, and a little to the cake in the mouse's paws.
Next, piece your mouse together using the Helmar Liquid Scrap Dots. The great thing about this glue is that you can play around with it, while it's still wet. This is helpful so that you can get your levels of depth just the way you want them !!! I wanted the cake to appear to be the closest thing to me, so I used three levels of the glue (I placed a little bead of glue on the back of the cake, waited about a minute or so, then added another bead on top of that, etc.) The elbows have about two levels of glue, as does the pom-pom on the hat.
P1110241
Once the mouse is complete, use this template to draw a simple cupcake shape onto some patterned paper. Add swirls of Helmar Acid Free Glue to the frosting piece and then sprinkle with glitter.
For the base of the cupcake, just add thin strips of patterned paper attached with the Helmar Liquid Scrap Dots. The chipboard letters and stickers are added after the strips are dry.
Use the Helmar Acid Free Glue to adhere the cupcake pieces together onto some cardstock. Cut out the cupcake, then embellish with beads (the Helmar 450 Quick Dry Adhesive works perfectly for this).
The glittered shape behind the mouse, is half of a flower that was cut from patterned paper, and then mounted to cardstock for strength. The flower was then covered with glitter, and attached to the back of the mouse using Helmar's Acid Free Glue.
P1110220
To complete the card, attach a folded piece of cardstock to the back using Helmar Acid Free Glue. Allow to dry, and then trim away the excess cardstock. The inside of the card was finished with letter stickers, and some letters cut from patterned paper.
P1110247
Supplies used:
Patterned paper - My Minds Eye
Rubber Stamp - Stampabilities
Fluid chalk - Color Box
Letter stickers - Making Memories
Chipboard letters - Cherry Arte
Colored pencils - Stanford Prismacolor
Cardstock - Prism
Embossing powder - Stampendous
Glitter, rick-rack and beads - Hobby Lobby

Monday, January 5, 2009

Helmar Giveaway!!!!

Who couldn't use free glue, right! Well, Helmar is offering two lucky winners the chance to receive a box of adhesive goodies. Check out the blog for more details and your change to win!
Hurry, you only have till January 31st!!!!!

_TWB4982
 
Blog Templates by Delicious Design Studio