Showing posts with label Holidays. Show all posts

Monday, December 11, 2017

Happy Holidays!

Hello, everyone. Christmas is right around the corner and I still have so much to do. How about you? I haven't even started shopping for gifts yet....but at least the house is decorated.  :)


This will be my last post for this year, so I just wanted to make sure I wished you all a wonderful Holiday Season and a Happy New Year.


Before I go, I like to share my latest project that was created for a "Mix It Up" design team challenge on the Doodlebug blog. I mixed old and new DB Christmas collections together to create this fun wall decor.  This piece is also available in my Etsy store.

Thanks for stopping by. See you next year!!! :)

Sunday, August 27, 2017

Another Christmas Countdown


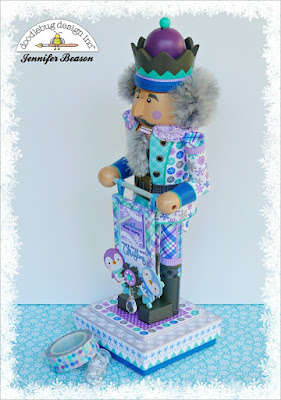
Hi all, today I'm sharing my second Nutcracker for Etsy. This one is more traditional in color, but was just as much fun to create. Doodlebug's, Here Comes Santa Claus paper collection was used on this along matching embellishments and other crafty supplies.


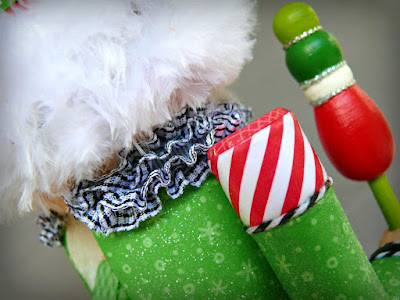
For my last nutcracker, I used a lilac ruffled ribbon for the collar. I loved the look and wanted to use it again, this time in black.  Unfortunately, I had the toughest time trying to find more of the same trim. Lucky, I remembered Really Reasonable Ribbon and found exactly what I needed.... and more! :) It was great to reacquaint myself with the store again and all of their beautiful trims and ribbons.


Here you can see a closeup of the Elastic Double Ruffle Ribbon. I layered two pieces together then glued them in place.


I also received some Metallic Silver String, as a sample. with my order and decided to use it around the decorative part of the wood staff.  Love the bling it adds to the piece. :)

Thanks for stopping by! Jen :)


Friday, August 18, 2017

New Items in Etsy Store

Happy Friday, everyone! Just checking in, to let you know JenniBean Studio has a few new listings.  This cute desk organizer .......


....and a set of Christmas tree ornaments.


These ornaments have a wood base and then were built up using chipboard. The cutting files used are from Doodlebug's, Here Comes Santa Claus SVG collection. The set of four (which includes hooks for hanging) is just 23 dollars.

Have a great weekend! :)

Monday, August 14, 2017

Doodlebug Christmas Countdown

The Doodlebug design team and I were challenged to share an "off the page" project. We will be sharing them for the next two weeks. I hope you will be inspired to try using your DB supplies for other types projects, as well as layouts.


Here is what I created. This 25-day countdown features Doodlebug's Polar Pals collection and is currently available in my Etsy store
*UPDATED: This item has been sold*


For more details, you can check out the Doodlebug blog HERE.

Wednesday, November 19, 2014

Christmas Countdown


Hello everyone! Yep, only 35 days until Christmas - Can you believe it?!!  I created this fun countdown for a friend, but all the details for creating your own are on the Maya Road DT blog.
The penguin is a Silhouette file (by Miss Kate Cuttables) and all the papers, die cuts, gems and stickers are from the North Pole collection by Doodlebug. Except for the black paper, which is from their Halloween Parade line.


I should be put on the naughty list for not posting these last month. But "better late, than never". These are some simple embroidery hoops made out of felt and lots of Maya Road embellies.  More details can be found HERE.


Thanks for stopping by! :)

Monday, December 10, 2012

The Season

Hi all! I'm back today with a quick post to share a gift card holder I made for my son's teacher. The owl design was from Lettering Delights. A really cool site I recently found, that has the cutest SVG files, graphic files and more.


I really didn't have to do much on this, I just added some fun embellishments, stickers and chipboard pieces on the eyes.

Under the head of the owl was a perfect spot to hide the gift card. So I made a small pocket out of patterned paper and added a few more stickers. Easy! :)

Supplies used:
Owl Design - Nancy Happy Holiday (Cut It Set) From Lettering Delights
Patterned Paper - Basic Grey and My Minds Eye
Stickers - Echo Park
Chipboard, Trinket pins and beads - Maya Road.
Baker's twine - The Twinery


Thursday, November 10, 2011

Basic Grey Projects

Hi everyone! Before I get started I just want to thank everyone for all the birthday wishes yesterday.  My little girl asked me how old I was and I had to stop and think about it for a minute - I honestly had forgot. When I told her I was 43, she said I was joking (lol) - I usually tell her 21, but I figured it was time to tell her the truth! :)

Today I have a couple Basic Grey projects to share. The first one is an assignment I did for the BG blog last week.  The Curio collection, which is what I used on this project, is so pretty and perfect for Fall. For more details on how I created this cone, you can go HERE.


My next project is a quick and easy one! I found some paper mache ornaments at Hobby Lobby, and "dressed them up" using papers from the Little Black Dress 6x6 paper pad and some lovely felt blossoms. I really love these flowers! I think I'll need at least one in every color! :)


Begin by covering three alternate sides of the ornament with a solid patterned paper of your choice. As you can see from the photo below, the paper does have to be cut to the exact size, as the middle section will be covered.
 

Now use some tracing paper and trace the outline of one of the sides. Transfer the image into your patterned paper and cut it out. Cut out 2 more (3 total) so you have enough for each side.

Apply glue to the ornament surface and glue your cut paper piece into place. Repeat this step until the ornament is completely covered.


    Next spray the ornament with a spray adhesive and coat with fine clear or translucent glitter. Allow to dry.


      Next use a fast drying craft glue to adhere the blossom to the top of your ornament.


        To hang my ornaments I have ordered some of these metal hooks, but you could easily thread some embroidery floss into the top of the flower and hang it that way.

        Thanks for visiting. I'll be back very soon with some more Basic Grey! 
        Jen :)


            Blog Templates by Delicious Design Studio